Apple Photos app has received several pretty impressive features in iOS 18. However, the one feature that has pleased me more than anything else is the ability to perfectly rearrange the photo albums on iPhone. Using this neat feature, you can fine-tune the order of the photo albums so that they appear in line with your preference. If you want to quickly access specific folders such as “Memories”, and “Featured Photos”, you will be able to access them with ease. Read on…
Perfectly Rearrange iPhone Photo Albums in iOS 18
The stock photos app has been redesigned in iOS 18. For a change, the app has become a bit more intuitive and offers many ways to organize photos.
- First and foremost, open the Photos app on your iPhone running iOS 18 or later.
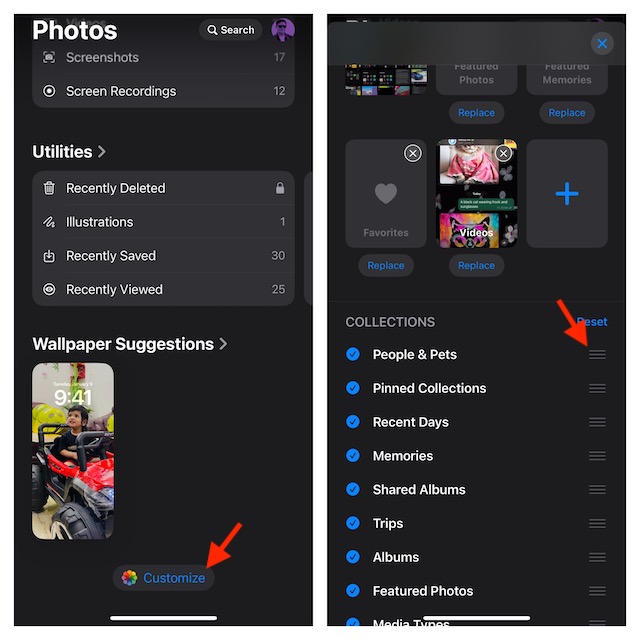
- After that, scroll down to the bottom of the screen and tap on the Customize button.
- Now, touch and hold on to the three-line icon and drag and drop it at the preferred spot.
- Once you have perfectly customized the order of the photo albums, tap on the X button at the top right corner of the screen and you are good to go!
So, that’s how you can perfectly rearrange photo albums on your iPhone running iOS 18 or later. Now that you have unlocked this neat feature, make the best use of it so that your photo albums are always in the right spot.
How Do You Sort and Filter Your Photos in iOS 18?
Sorting and filtering photos in iOS 18 is as simple as it can ever be.
- To do so, head over to the Photos app on your iPhone -> Swipe up, and tap on the upward/downward arrow.
- Now, you have the option to sort your photos by date captured or recently added.
- If you would like to filter your photos, tap on the Filter option in the menu and then choose the desired filter options such as favorites, Photos, Videos, and more.
How Do You Hide Photos in the Apple Photos App in iOS 18?
- If you want to safeguard your private photos from prying eyes, open the Photos app -> Now, select all the photos that you want to hide.
- Then, tap on the triple-dot icon at the bottom right corner of the screen.
- Next, select the Hide option.
- From now on, your hidden album will appear in the Utilities section.
- For an additional layer of safeguard, I would recommend you lock your hidden photo album with Face ID. Go to the Settings app -> Apps -> Photos app -> ensure that the switch for Use Face ID/Touch ID is turned on.
Read more: How to Capture Screenshots With a Vocal Shortcut on iPhone in iOS 18