The “Eye Tracking” is an exceptionally helpful Accessibility feature designed to let you control your iPhone using just your eyes. Specifically created for people with physical and motor disabilities, it works pretty well and offers a wide range of customization so that you can fine-tune the tracking in accordance with your preference. In this very aspect, I’m going to talk about the 4 different ways to enable Eye Tracking on your iPhone.
Different Ways to Enable iOS 18 Eye Tracking on iPhone
Aside from the Settings route, there are a couple of handy methods through which you will be able to trigger eye-tracking on your iOS device with utmost ease.
1. Enable and Customize Eye Tracking from the Settings App
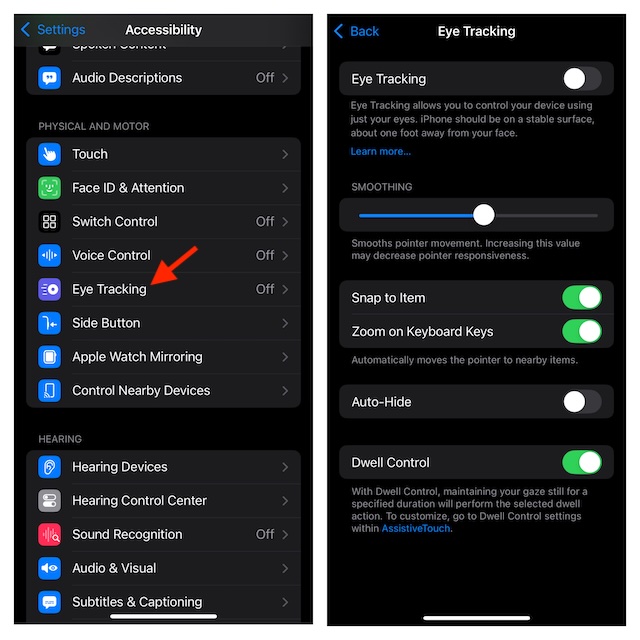
Settings app provides a straightforward way to enable and customize Eye Tracking. Whether you want to smoothen up the pointer movement, auto-hide the menu, or use the Dwell Control in sync with eye tracking, the Settings app has got you covered.
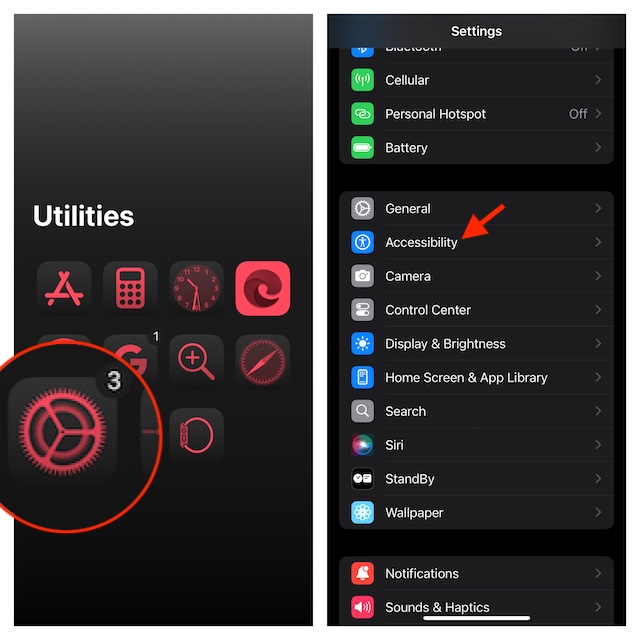
- To get going, head into the Settings app -> Accessibility.
- Under the Physical and Motor section, choose “Eye Tracking”.
- Now, customize everything in keeping with your needs.
2. Add Eye Tracking to Your iPhone’s Control Centre
If you want to quickly access and activate Eye Tracking on your iPhone, why not add its icon to the Control Center?
- To get it done, swipe down from the upper right corner of the screen and tap the “+” Plus button at the upper left.
- Now, tap the “Add a control” button.
- Navigate to the “Motor Accessibility” section and choose the Eye Tracking icon.
- Then, hit the empty space to confirm the change and get out of the editing mode.
- Going forward, you can activate the Eye Tracking feature by just tapping its Control Center icon.
3. Add Eye Tracking to Your iPhone’s Lock Screen
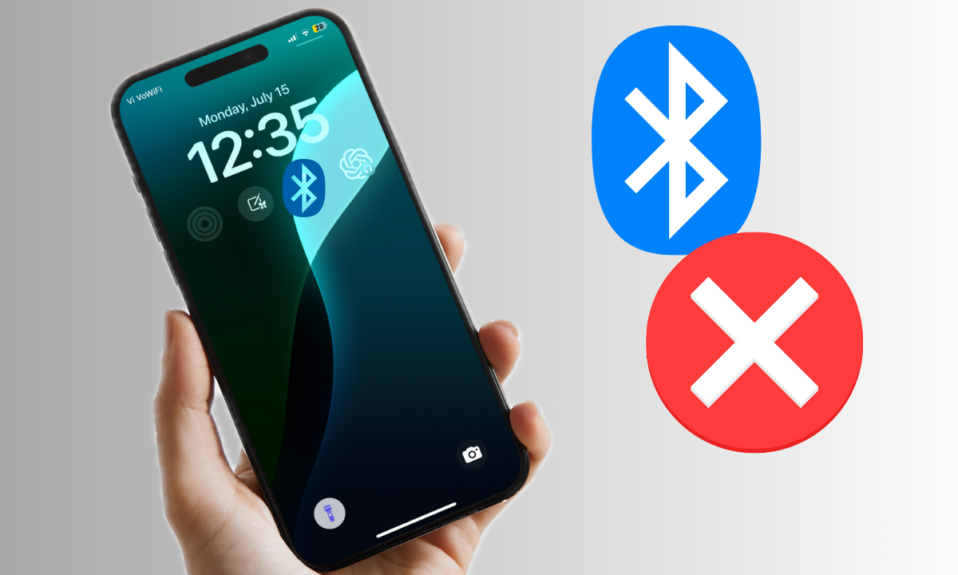
With the Eye Tracking icon readily available, you can display the Eye Tracking icon right on your iPhone Lock Screen. Yeah, you got that right! You can trigger and use this handy feature right from your Lock Screen.
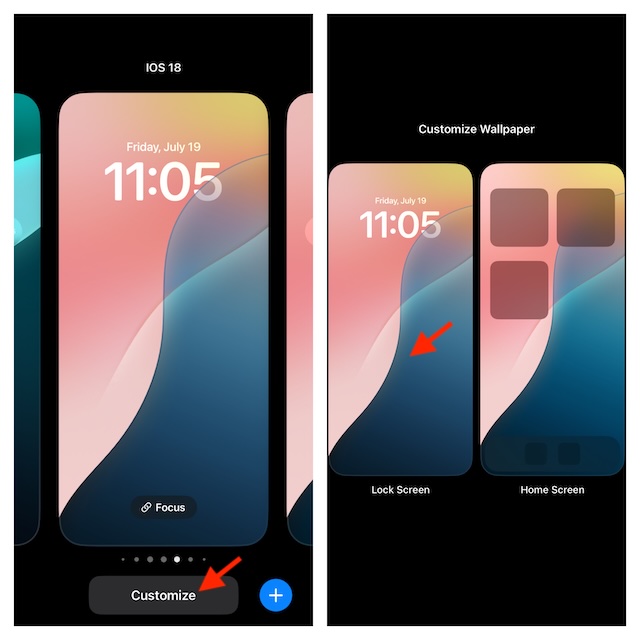
- To do so, press the power button of your iPhone to access the Lock Screen -> Now, verify your identity with the help of your Face ID/Touch ID -> Once the authentication is done, long-press on the screen -> tap the Customize button and choose Lock Screen.
- When you are in the Lock Screen editing mode, tap the “-“ minus button at a control -> tap the “+” Plus button -> Under the “Motor Accessibility” section, and choose Eye Tracking.
- To confirm the change, tap the Done button at the top right corner of the screen and you are all set!
4. Enable Eye Tracking with Accessibility Shortcut
Frankly speaking, the easiest way to invoke “Eye Tracking” on iPhone is by using the Accessibility Shortcut. Getting the most out of this shortcut, you can trigger the eye-tracking functionality by triple-clicking the side button of your iPhone.
- To bring this shortcut into action, head into the Settings app on your compatible iPhone-> Accessibility -> Accessibility Shortcut -> Eye Tracking.
- Once you have perfectly set up the Accessibility Shortcut, triple-click the side button of your iPhone to activate eye-tracking.
- One essential thing that you must keep in mind is that if the Accessibility menu has multiple features, triple-clicking the power button will reveal a menu. Hence, you will have to select the eye-tracking feature in order to activate it.
